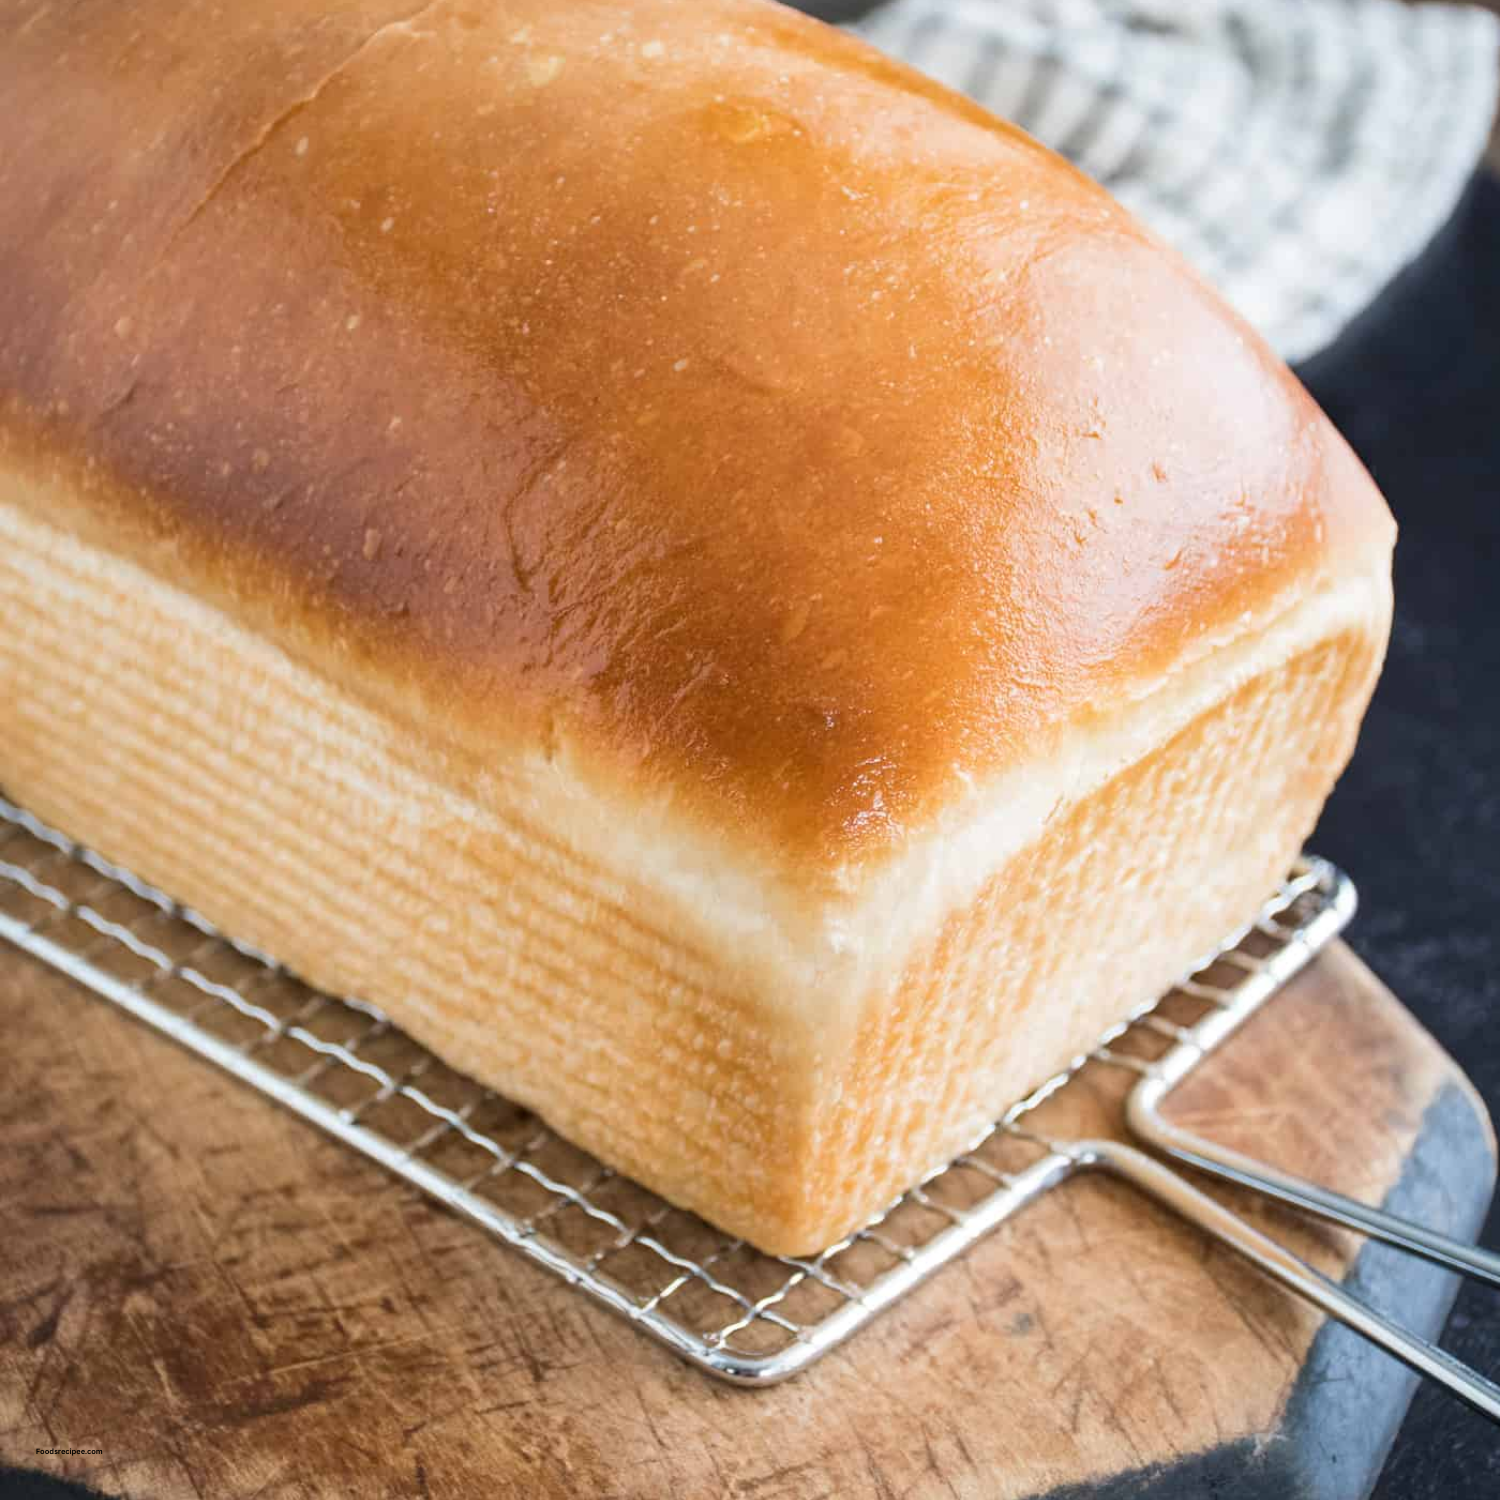
Soft & Airy Gluten Free Sourdough Sandwich Bread Recipe
Gluten Free Sourdough Sandwich Bread
Finding a gluten-free bread that actually bends without breaking is the ultimate quest for the GF community. This Gluten Free Sourdough Sandwich Bread is the answer. It combines the tangy, complex flavor of traditional sourdough with a soft, tight crumb perfect for sandwiches, toast, or grilled cheese.
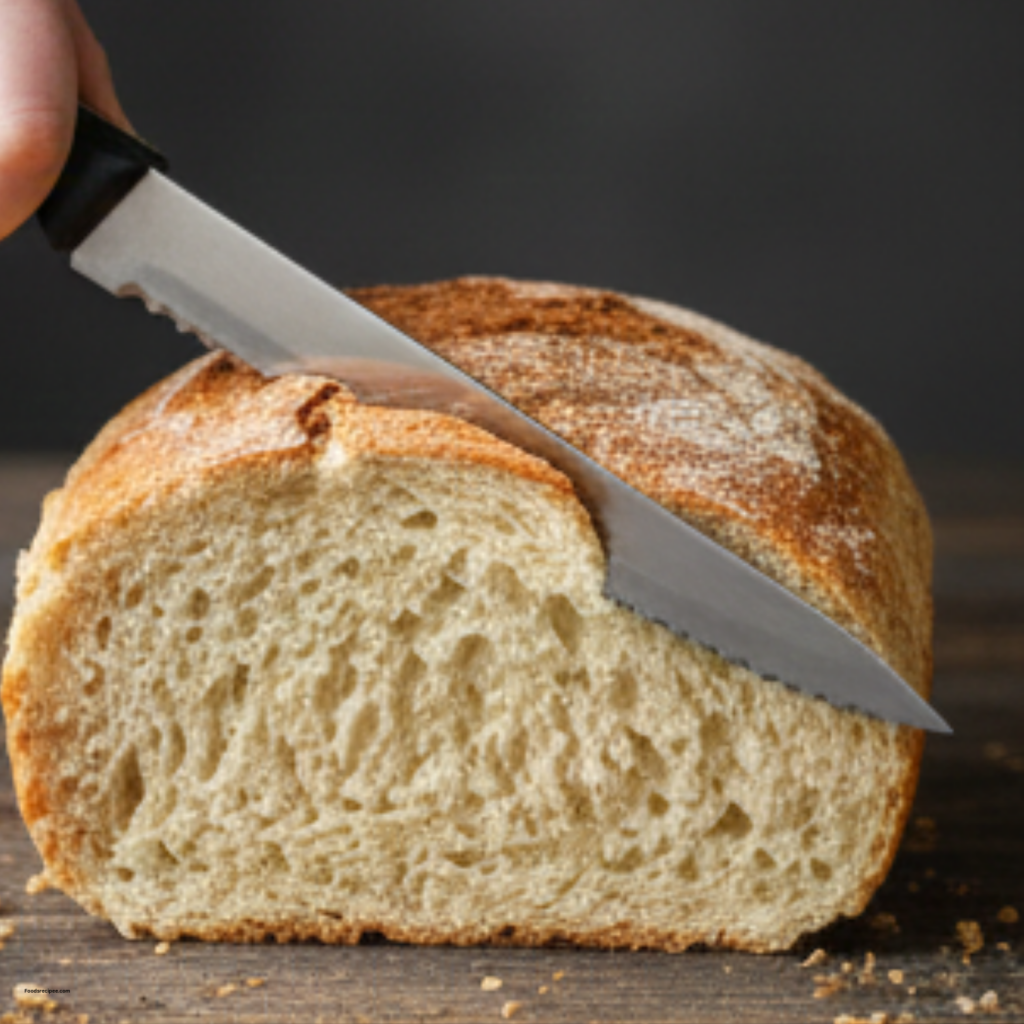
Table of Contents
Do This First:
Before you even touch your flour, ensure your Gluten Free Sourdough Starter is active and bubbly. A “fed” starter (one that has been fed 4–8 hours prior) is the engine of this bread. If your starter is sleepy, your bread will be dense.
A Note on Gluten Free Flour Blends:
Not all GF flours are created equal. For this sourdough, a blend containing Sorghum, Millet, and a touch of Tapioca starch works best. If your blend doesn’t include Xanthan Gum or Psyllium Husk, you will need to add it to ensure the bread has structure.
Breakfast or Side Dish? The Perfect Ways to Serve
This gluten free sourdough is incredibly versatile, making it a staple for any meal of the day. Because of its sturdy structure and complex flavor, you can enjoy it in multiple ways:
- For Breakfast (The Star): The signature tangy flavor of sourdough makes it the ultimate breakfast base. Use it to create a gourmet Avocado Toast with poached eggs, or use thick slices for French Toast, as the crumb absorbs egg wash perfectly without becoming soggy.
- As a Side Dish (The Partner): This bread shines as a side for lunch or dinner. Toast it with garlic butter to serve alongside Gluten Free French Onion Soup or a bowl of hearty pasta. It’s the perfect vessel for soaking up savory sauces and rich broths.
How to Make Gluten Free Sourdough Sandwich Bread (Step-By-Step)
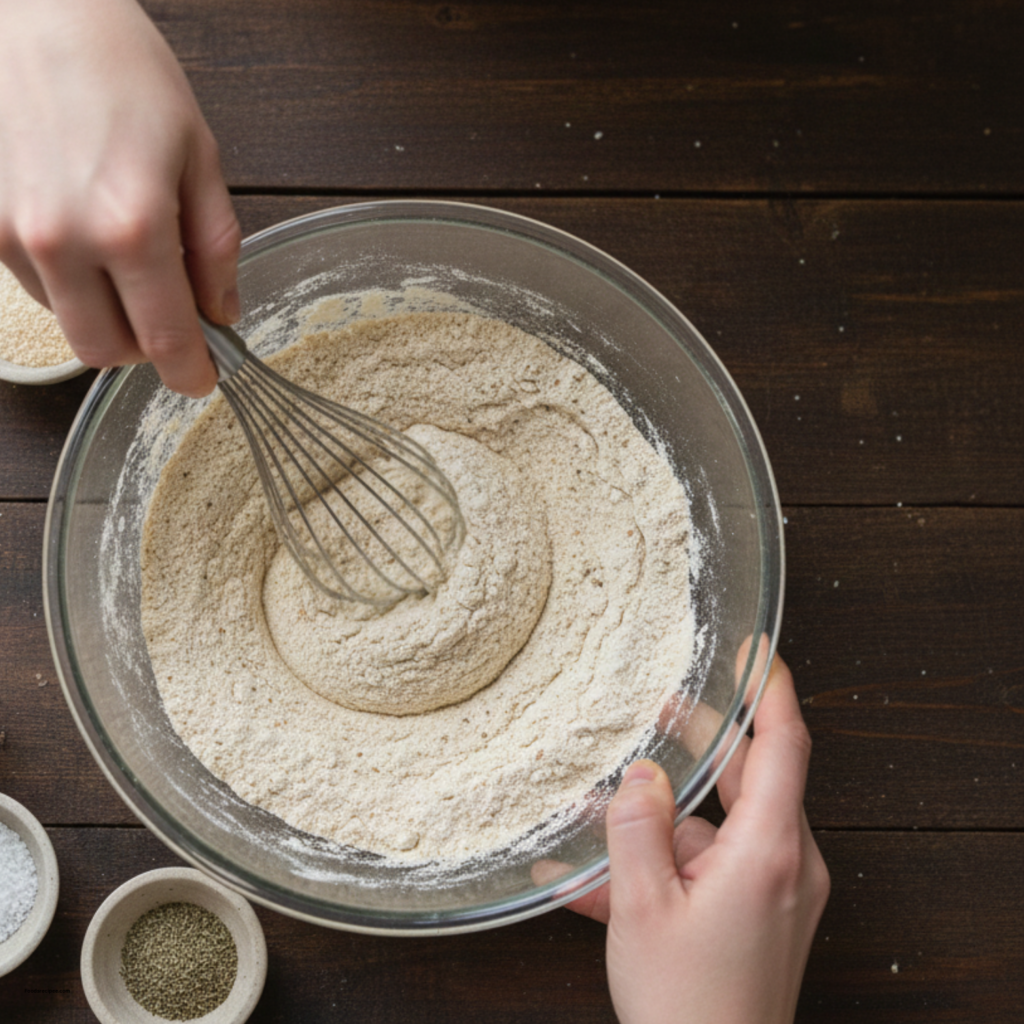
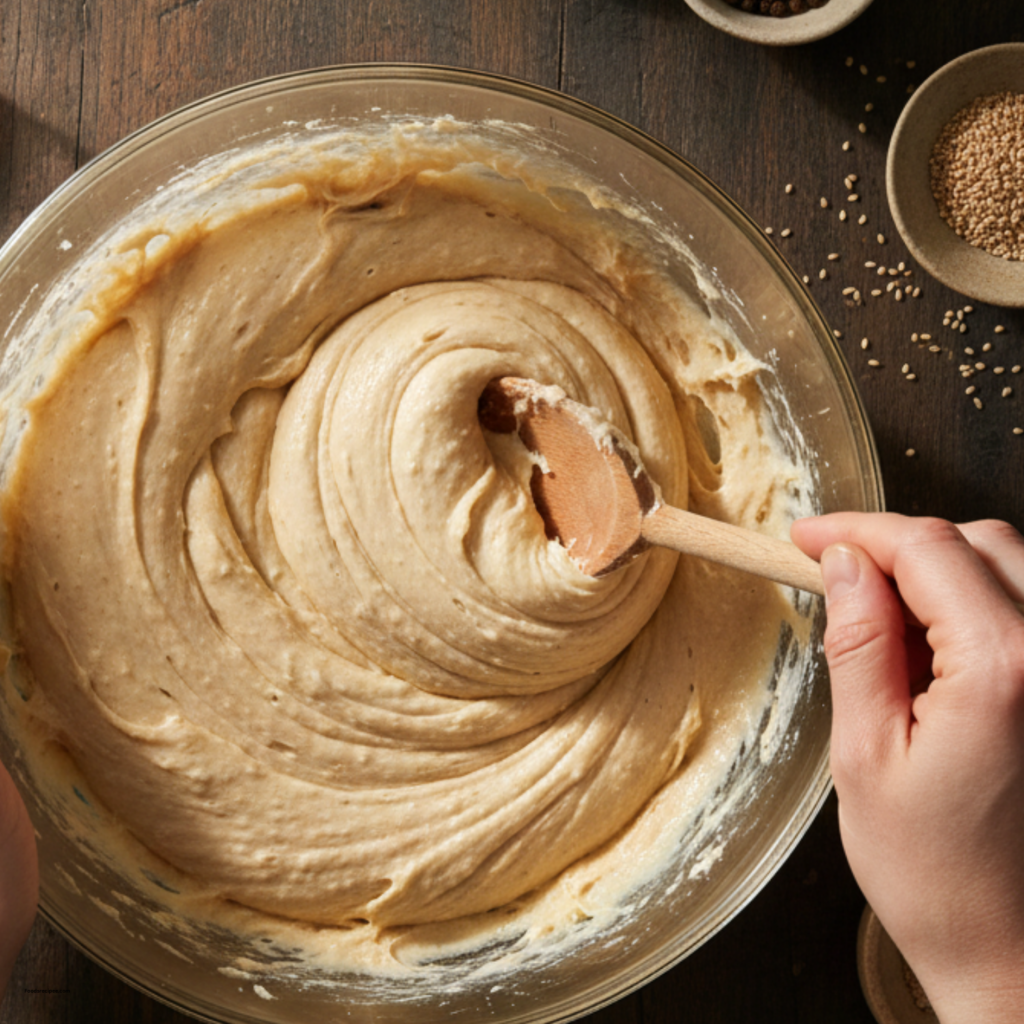
- The Premix: Whisk together your dry ingredients in a large bowl.
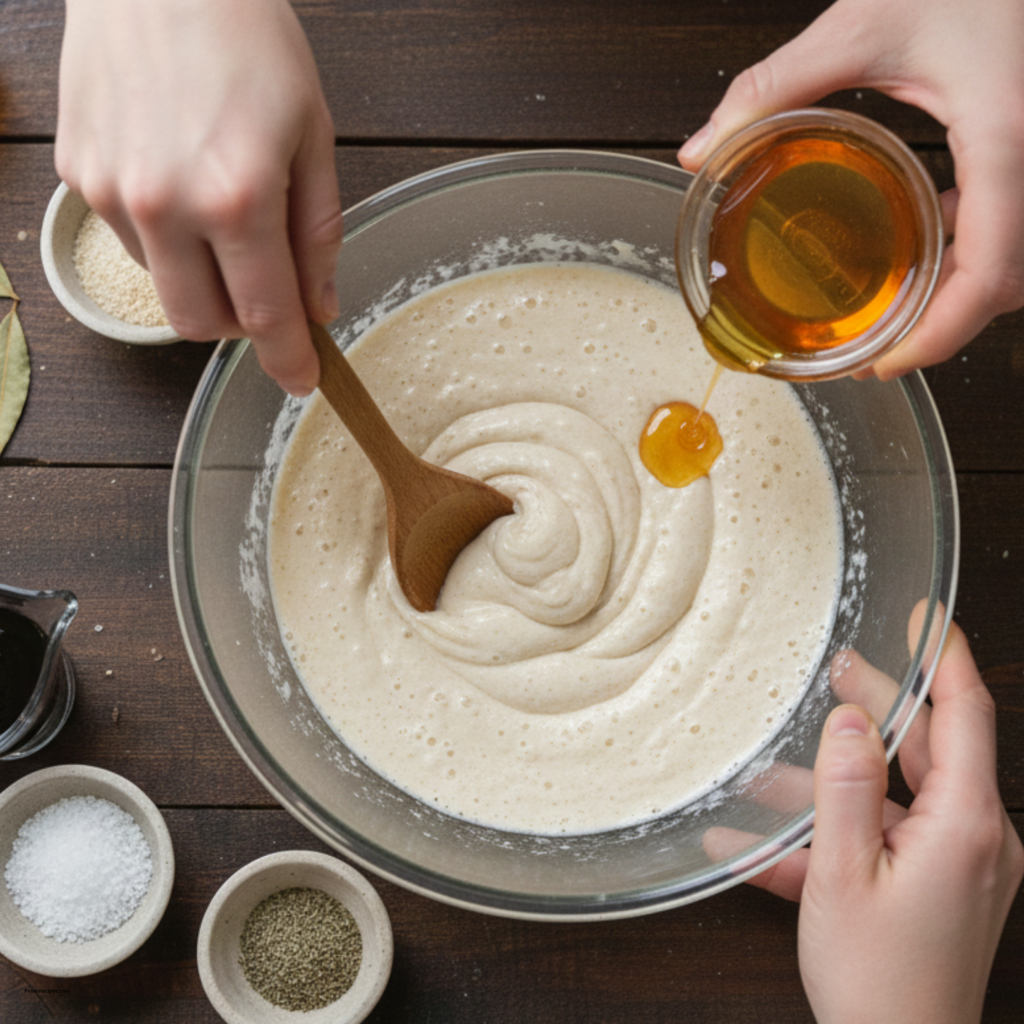
- The Liquid Gold: Mix your active starter with warm water and a little honey (to feed the wild yeast).
- The Mix: Combine wet and dry. The dough will look like a thick cake batter.
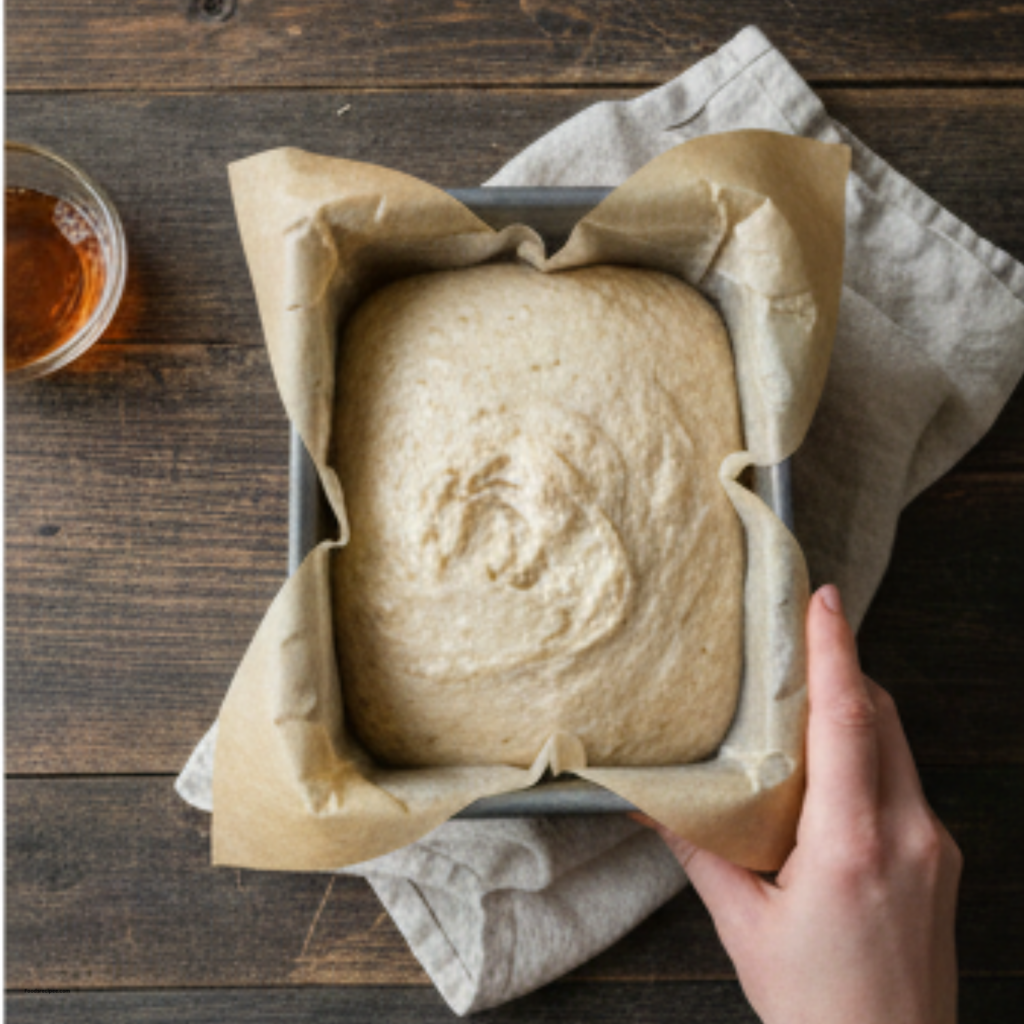
- The Proof: Place the dough in a lined loaf pan. Cover with a damp cloth and let it rise in a warm spot for 4–6 hours (or until it has doubled).
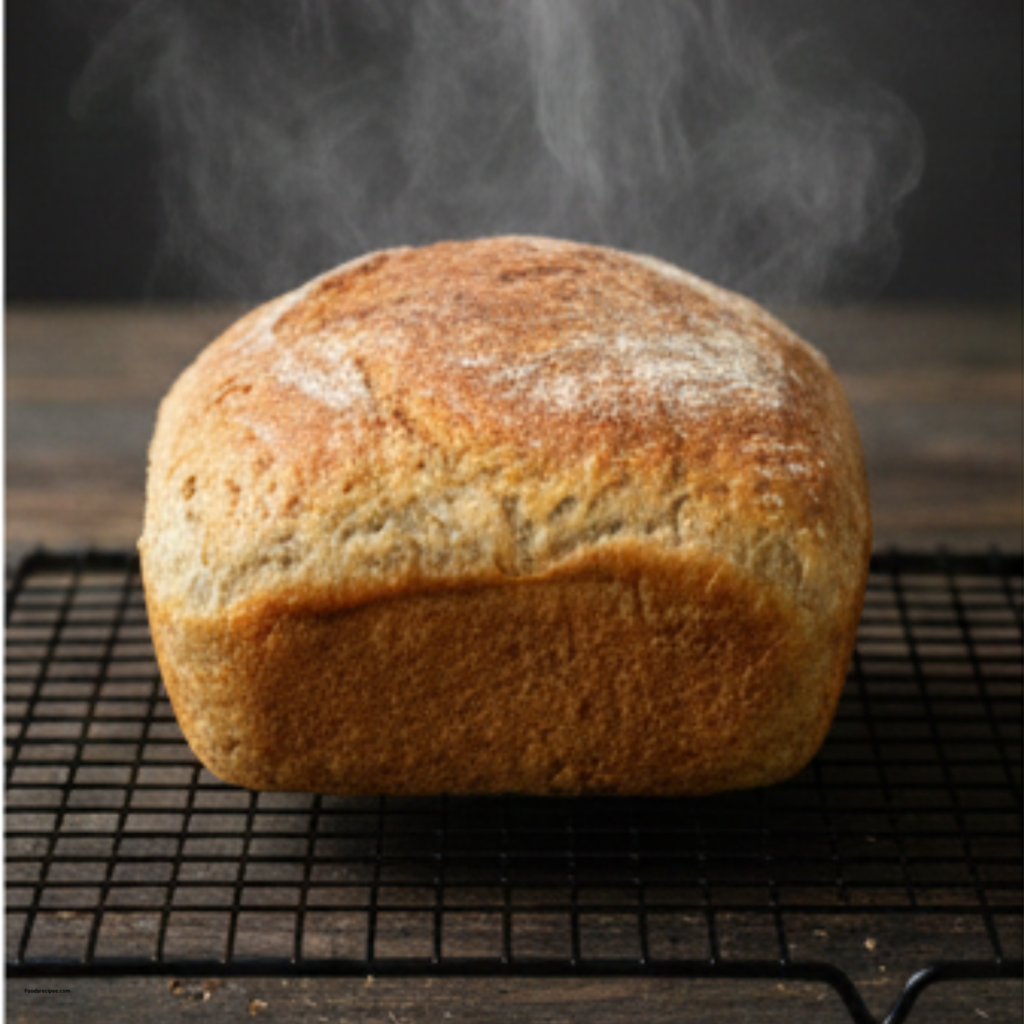
- The Bake: Bake at 400F for about 50 minutes until the internal temperature reaches 205F.
Why Water Quality Is Important:
Chlorinated tap water can sometimes inhibit the growth of wild yeast in your sourdough. For the best rise, use filtered or spring water at room temperature.
How to get crusty bread:
For that professional bakery finish, place a shallow pan of water on the bottom rack of your oven during the first 20 minutes of baking. The steam keeps the crust soft initially, allowing the bread to expand, and then hardens it into a beautiful, golden-brown crust.
Frequently Asked Questions:
Q: Can I use a bread machine?
A: Yes! Use the “Gluten-Free” setting, but ensure you add the starter during the liquid phase.
Q: My bread is gummy in the middle. Why?
A: You likely cut it too soon! Gluten-free sourdough MUST cool completely (at least 3-4 hours) for the internal structure to set.
Serve Gluten Free Sourdough Bread With:
- Homemade Strawberry Jam
- Avocado and Poached Eggs
- Warm Winter Soups (like our French Onion!)
Ingredients 1x2x3x
- 1 cup Active GF Sourdough Starter
- 1 ½ cups Warm Filtered Water
- 3 cups GF Bread Flour Blend (with Xanthan Gum)
- 1 tsp Sea Salt
- 1 tbsp Honey or Maple Syrup
Instructions
Do This First:
Feed your starter and wait until it is at its peak (bubbly and doubled in size).
Make The Bread:
- Whisk flour and salt.
- In a separate bowl, dissolve honey in warm water, then stir in the starter.
- Combine wet and dry ingredients. Beat for 3 minutes until smooth.
- Transfer to a greased loaf pan. Proof for 4–6 hours.
- Bake at 400F for 45–55 minutes.
Notes
- The “Gum” Factor: Gluten-free sourdough relies on binders like Xanthan Gum or Psyllium Husk. If your flour blend doesn’t include these, your bread will not hold its shape. For the best “bendable” sandwich slice, I recommend adding 1 tablespoon of whole psyllium husk to the mix.
- Cooling is Key: This is the hardest part! You must let the loaf cool completely on a wire rack for at least 3 to 4 hours. Cutting into a hot loaf of gluten-free bread traps the steam inside, resulting in a gummy, wet texture.
- Storage: Because this bread has no preservatives, it stays fresh on the counter for about 2 days. For longer storage, slice the loaf and freeze it with parchment paper between slices so you can grab one piece at a time for toasting.
SPECIAL NOTE
The secret to a “Real” Sourdough taste in gluten-free baking is the long ferment. If you have the time, after putting the dough in the loaf pan, let it sit in the refrigerator overnight (covered) instead of the counter. This cold fermentation slows down the rise but allows the wild yeast to develop a much deeper, more authentic sourdough tang that is hard to achieve with a quick counter rise.
Nutrition
Per Serving (1 Slice – based on a 12-slice loaf)
| Nutrient | Amount |
| Calories | 165 kcal |
| Total Fat | 3g |
| Saturated Fat | 0.5g |
| Sodium | 210mg |
| Total Carbs | 32g |
| Dietary Fiber | 4g |
| Sugars | 2g |
| Protein | 3g |
Nutrition Disclaimer
Nutritional information is an estimate calculated based on a standard gluten-free all-purpose bread flour. Because gluten-free flour blends vary wildly in their ingredients (some use heavy starches while others use high-protein grains like teff or sorghum), the actual calorie and carb count may change. Please check the labels of your specific flour blend and starter ingredients for the most accurate nutritional data.